Friday, July 25, 2014

Crafting and New Projects

It's probably about time that I explain the new little button up in the corner of my blog "I sell on Etsy".
I DO! And I'm thrilled about it, and at the same time, I have no idea what I'm doing. If there is something I've learned about myself over my 27 years... it is this:

I REALLY like to come up with ideas.
I like to create things.
I like to be good at something.
I like to have a hobby.
I like to give gifts.
And more recently... I like to MAKE gifts.
What's more, I am actually decent with a sewing machine.

My wonderful husband has encouraged my new found hobby, and even spoiled me with a serger for Christmas.

I've loved learning new things on my own, and taking on new projects. Most recently, my sewing endeavors began with a Halloween costume. Steve has this GREAT pirate costume, and I've always wanted an excuse for a couple costume... so I picked up a pattern and have slowly built my own.


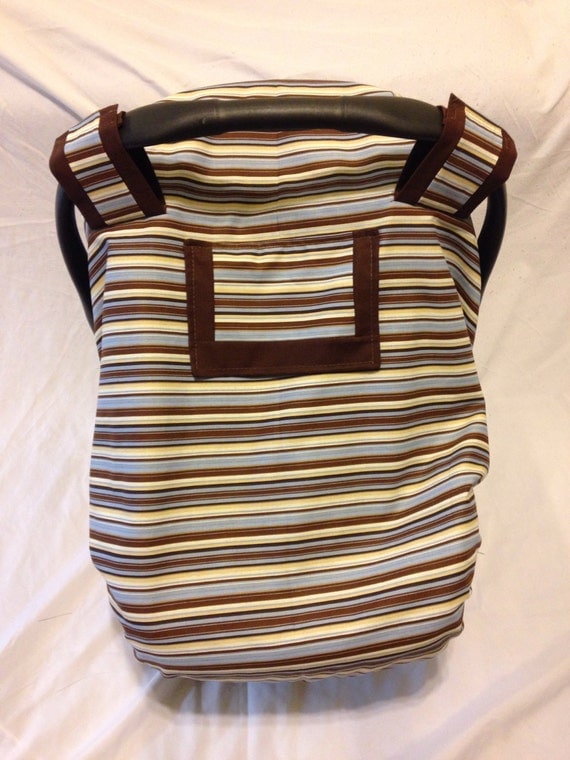
I then turned to making aprons and car seat covers for friends as they got married and starting having babies. And I haven't stopped.
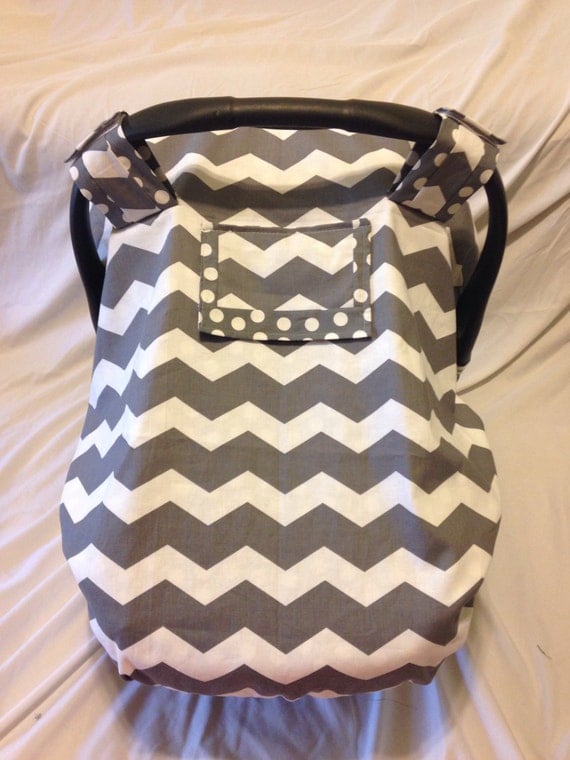
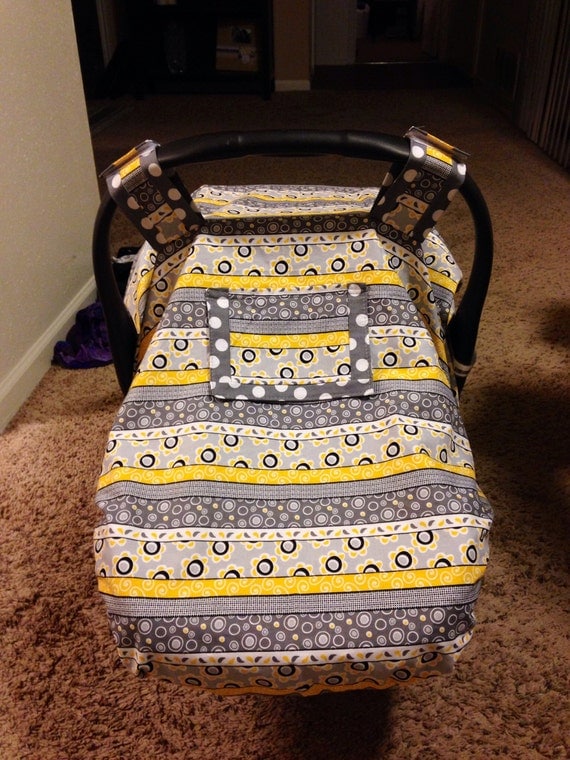
Gray Chevron Fitted Carseat CoverCustom Fitted Car Seat CoverBlue and brown stripe fitted car seat cover

One of the things I love most about my new found hobby is that I can see how much I've learned! I've also learned to trust my sense of style, and my ideas and who doesn't need a good confidence booster every now and then?

I get really excited when I learn how to improve something, and when it turns out well. I am even more excited when people are happy with their gift. It's been an interesting road trying to decide to start a shop and sell my little projects because I get so much enjoyment from gifting, but I'm optimistic about things, and I'm excited to try new projects to sell (and gift).

"Expansions" soon to come to my etsy shop include: Binky clips, burp cloths, and EVENTUALLY travel changing pads! These will be offered individually, and as a coordinating "baby shower gift pack".

Some of my other crafting loves lately include card making, and I hate to be cliche, but I LOVE MAKING RELIEF SOCIETY HANDOUTS. I've decided that among my recipes and other crafting shares, I am going to start sharing some of my other hobbies and in the hopes that you can enjoy them along with me!

The first share being from my lesson last week (which I realize is probably too late for anyone else to enjoy or use) from the Joseph Fielding Smith manual, Chapter 13 - Baptism. As I start to share these, you'll see that one of the things I LOVE to do is give challenges to the sisters, which tend to build on each other. A few weeks ago we focused on improving our personal study, and this week the challenge was to incorporate our topic of baptism and our covenants into our personal study. Our handout included suggestions (including hymns) for personal study.
For any interested in using this. I have a .pdf file I'd be happy to send you which includes four handouts front and back that easily print out to cardstock, ready to be sliced!


Monday, February 10, 2014

Almond Meringue Kisses

I made these yummy little low calorie treats for a girl's day a few weeks ago and I've honestly been craving them since. I found them here, and didn't tweak it at all, but definitely have a few tips...

What you'll need
2 egg whites
1 tsp almond extract
1 tbsp cornstarch
1/4 tsp cream of tartar
1/8 tsp salt
1/2 c sugar or sugar substitute (follow package instructions to use equivalent to 1/2 c sugar)
parchment paper or piping bag
large closed star tip
2 cookie sheets
parchment paper for lining

Let egg whites stand in bowl at room temperature for 30 minutes. Pre-heat oven to 300*. (Tip one: when the recipe says 300*, pay attention. If you set your oven at 350*, YOU WILL BURN THEM. Yeah I know this is a given, but sometimes I don't pay attention). Line your cookie sheets with parchment paper.

For those of you unfamiliar with parchment paper, this used to be terrible to find, but now you can find Reynolds brand by the foil at the grocery store. You can also find it at bakery supply stores (for those of you in Utah, check Orson Gygi or Baker's Cash-n-Carry). I've also had luck asking for the grocery store bakery to sell it to me per sheet... that will depend on management though.

Add almond extract, cream of tartar and salt to egg whites. Beat with electric miser on medium to high speed until soft peaks form. Soft peaks = curled tips. Careful here, you don't want to over beat your meringue. Combine sugar and cornstarch in separate bowl and slowly add the sugar mixture to the egg mixture (SLOWLY, as in 1 tbsp at a time slowly), while beating on high until stiff peaks form. Stiff peaks = tips stand straight.

Prepare your piping bag with the closed star tip. I only had an open star tip and mine did not turn out very fancy looking. They tasted great, but when I make these again I'll be stopping for a new piping tip. Pipe 1 1/2 inch kisses on cookie sheets about 1 inch apart. Bake on separate oven racks for 12 minutes. After twelve minutes, turn of the oven and leave the door closed for 1 hour. This hour is drying time and prevents your kisses from being gooey and lets them set. After 1 hour, remove the cookie sheets from oven and transfer to wire rack to cool completely.

After they are cooled you can you a clean food brush (or NEVER USED paint brush) to brush on some luster dust or coco powder.

Store in a single layer in an air tight container. If you live in humid weather, make sure you seal these up quickly or they will become tacky.

Want to know the best part about these? If you use sugar, they are only 13 calories each! If you use a sugar substitute (such as Splenda) they are 9 calories each. They a such a yummy sweet crunchy treat. They were a hit at my girls day and would be a great little treat for a shower or an open house.

I'd really like to experiment with extract flavors on this one. I personally love almond, but I may like to try peppermint or vanilla!

ENJOY!

Monday, February 3, 2014

One Year

One year ago I married the man of my dreams. It is such a weird sensation to think that time has gone by so fast, and yet feel like he has been the most important part of my life for so long. They say that the first year of marriage is the hardest. I'm not sure if I agree. This year has been hard. Hands down. It has been one of the most stressful and emotionally trying years yet, but our marriage has not been hard. Sure, there was an adjustment period, and Steve still prefers to have his own bathroom (not that I'm arguing with that), but our marriage is stronger and happier than I ever expected.

Through this very tough year I have learned a lot about this man that chose me, and because of this year...
I trust him more
I learned to turn to his strength
I cried less over little things, and he share in my tears for the not so little things
I am more patient
Life feels more stable
I have a deeper testimony
I have laughed SO much
I have learned how to be more supportive
I am more confident
I am happier (the deep down smile for no reason at all happy)
I am a better person
I am more in love!

I don't know how many years I felt resentful that my knight in shining armor was late, but I've realized that he was EXACTLY on time. I've learned to trust that my Heavenly Father really does know me. He sent me the person I needed the most, when I needed him the most. I am so excited to grow with him more each year, and I hope that I can continue to learn to be as loving and supportive to him as he is to me.

Steven, I am so thankful you are mine! ETERNITY!

Tuesday, January 21, 2014

Grilled Artichoke w/ Skinny Garlic Aioli

I have loved artichokes for a VERY long time, but I found this new way of cooking them, and I probably won't ever do them any other way. For those of you who are unfamiliar with artichokes, I'll include preparation instructions and point you in this direction.

Artichokes can be pretty expensive, so this is usually a birthday dinner request or a rare treat, HOWEVER I have found that Costco occasionally carries bags of four for a great price, so keep an eye out.

What You'll Need
Artichoke
Whole raw artichoke
serrated knife
kitchen shears/sharp scissors
baking sheet
steamer (or large pot with steaming basket)
1 tbsp extra virgin olive oil
1 tbsp balsamic vinegar
salt and pepper
grill

Skinny Garlic Aioli
2 tbsp PLAIN greek yogurt
2 tbsp LITE mayo
1 clove garlic - minced
salt and pepper

To Prepare Your Artichokes
Trim your stem about 1 - 1 1/2 inches from the base of your artichoke.
Cut about 1 inch off the top, straight through the leaves. I've found that a serrated knife does this job best.
Use the shears to cut off the tips of the leaves. BEWARE: you're cutting these off because they have little spines and they are MEAN. 

You'll end up with something like this

I have an AMAZING steamer from Black and Decker. They are very affordable and I use mine almost every day. Mine came from Walmart but I've seen them at target and Bed, Bath and Beyond as well. You can also steam your artichokes by putting a few inches of water in a pot and placing the artichokes in a steamer basket. I usually cut my artichokes in half length wise to use in my steamer, but whole works just as well. Either way you'll be slicing them, I just prefer to do it when the artichoke isn't hot and wet. 

Steam for 30 minutes. The steam should easily pierce with a fork when it is done. 

Once steamed, cut in half length wise (if you haven't already) and scrape out the "choke" or center of the artichoke. Your goal is to remove all of the fuzzy, hairlike spines in the center, as well as all of the purple leaves. They should easily come out with a spoon. 


Drizzle the olive oil and basalmic vinegar on a cooking sheet, and sprinkle with salt and pepper. Place the artichokes cut side down to rest for about 1/2 hour. 

Heat your grill to medium high and grill cut side down for 5-7 minutes. 

To make the aioli, combine all ingredients in a small bowl. The recipe makes 2 servings of about 50 calories each. We ended up dipped everything in the aioli, it was so yummy!

According to myfitnesspal, one large artichoke (heart and leaves) is about 100 calories. They are high in antioxidants, fiber, and are said to aid in digestion and lower cholesterol. 

This may be kind of a tricky one for people new to artichokes, so feel free to post questions!

ENJOY!


Monday, January 13, 2014

Crockpot Ranch Pork Chops

This one is super quick and easy, and was perfect for Sunday dinner yesterday!

What You'll Need
Crockpot
Crockpot liners (optional)
Skillet
Olive Oil
4 pork chops (I used thick cut)
10 oz can - cream of chicken soup
water
Medium yellow onion
Ranch dressing mix

Put your skillet on the stove and heat to med-high heat. While that's heating up...
Put the liner in your crock pot (or spray with non-stick spray)
Slice your onion and line the bottom of the crock pot
Once your skillet is hot, drizzle with a little bit of olive oil and brown each side of your pork chops. You're not looking to cook these through here, so leave them on just long enough for them to brown just a bit.
Place the pork chops in the crock pot on top of the onions. My 5 qt crock pot was just big enough for 4 of the large chops I got in a pack at Costco. I would guess that if you got thinner chops you could layer them, but I've never tried it. You'll just want to make sure you can cover all of the meat with your soup mixture.
In a separate bowl, mix the can of cream of chicken with 1 can's worth of water and the ranch packet. I whisked mine pretty well to get rid of the lumps. Pour the "soup" over your chops and give them a little nudge to let the soup work its way down and around them.
Cover the crock pot and cook on high for 3-4 hours (I let mine sit for 4 1/2 because I had monster size chops), or low 6-8 hours. 

These were honestly better than I expected. Not dry and had a nice flavor. The original recipe here did not have the added onions, but that was one of my favorite parts about the recipe, so I'd recommend the change. 

I served this with garlic mashed potatoes and roasted cabbage, and it got good reviews all around.

I also threw the recipe into MyFitnessPal and was surprised that is is also fairly low calorie! 

ENJOY

Tuesday, December 17, 2013

Lemon-Dill Shrimp & Pasta

This is one of Steve's favorite recipes, and we've made it a few times in the past month so I thought I'd share. I found the original recipe here.

What You'll Need
12 oz Medium shrimp (peeled, de-veined)
1 lemon (zest and then juice)
8 oz dried pasta
2 Tbsp Olive Oil (I use extra-light flavor)
3-4 cloves garlic, minced or thin sliced (I use bottled)
6 C baby spinach
1/2 tsp Italian seasoning and/or dill
Salt and Pepper to taste
Large skillet
zester or fine grater

Cook pasta according to directions. I usually use a whole wheat fettuccine. I REALLY love the flavor of whole wheat pasta. If you haven't tried it... DO IT!
Zest and juice your lemon. Reserve 2 Tbsp of juice. I've used bottled juice and it works fine, but fresh will always taste better. If
In a large skillet (I'm serious, use a large one!), heat your olive oil over medium heat and cook the garlic for a minute or so. Be careful not to burn it! Add your shrimp and cook until the shrimp are opaque (about 4-5 minutes). Turn the shrimp frequently to cook evenly and avoid burning. I cheat here and just thaw some pre-cooked shrimp from Costco and warm it up in the skillet. Makes a quick meal even quicker and is very economical.
Add the cooked pasta and spinach. I know it seems like a LOT of spinach, but it really does need the whole 6 cups. Stir in the skillet until the spinach begins to wilt. You'll want to keep an eye on it so you don't turn your spinach to mush. Add the 2 Tbsp of lemon juice and zest, season with salt and pepper and Italian seasonings, and dill. Stir to coat and serve hot. I've left off the dill, and it is still delicious... so if you don't like dill you can leave it out.

This is such a yummy light but filling meal. This recipe makes about 4 servings at 359 calories per serving (and that's using regular pasta).

ENJOY!

Tuesday, December 10, 2013

Oven Baked Fish with Dill & Lemon

Here is another of my favorite ways to do fish... and really if you're going to buy a Costco sized bag of anything, you better have a way to switch it up or that bag will sit in the freezer for a long time. This recipe works with all the fish I've tried (Salmon, Tilapia, Mahi Mahi), but my favorite is always a white fish... Salmon isn't my favorite.

What You'll Need
Fish fillets - Frozen or Fresh
Garlic - I prefer the fresh or minced bottled over powdered
Salt
Pepper
Butter
Dill - Fresh or dried
Lemon or lime slices
Foil
Baking dish
Non stick spray

This one is SUPER easy and yummy! Preheat your oven to 350* and spray your baking dish. You really need a dish vs. a pan because you'll need to cover it with foil WITHOUT the foil touching the fish.

If you're using frozen fillets, thaw and pat dry. Fresh fillets could probably use a little pat as well. Place the fillets in your dish. If you're cooking a fish with the skin on (like a fresh Salmon), place the fish skin side down. Put a tab of butter on top of each fish fillet, don't be shy... butter makes everything yummier! Place 1-2 crushed cloves of garlic on top of the butter, and sprinkle with salt, pepper, and dill. Don't be shy on the dill either. It has a great flavor that goes so well with fish. As always, I use kosher or course sea salt, but table salt works just as well.


A couple of slices go on top of each fillet last. Cover your dish with foil and bake for 20-25 minutes. The fish is done when it is completely opaque and flakes easily with a fork.

This pairs GREAT with the lemon rice (recipe here)

The great thing about this recipe is that it is totally flexible to how you like the flavor. Add more garlic, salt, pepper, dill or lemon/lime slices. Try adding different herbs or seasonings per your preference. Plus, it's quick and easy to adjust portions. This idea came from my mom and I ate it A LOT when I was single and cooking for myself.

ENJOY